이번 시간에는 Controller 클래스를 만드는 방법과 요청 처리 메서드 작성법에 대해 알아보자.
Controller와 요청 처리 메서드
@Controller
Controller는 클라이언트의 요청인HttpServletRequest를 처리하는 클래스로Handler라고도불린다. 스프링에서는 Controller를 구현하기 위해@Controller라는 스테레오 타입 애너테이션을 사용한다.
@Target({ElementType.TYPE})
@Retention(RetentionPolicy.RUNTIME)
@Documented
@Component
public @interface Controller {...}
@Controller는 클래스 레벨에서 사용할 수 있는 애너테이션으로내부적으로 @Component를 포함한다. 클래스내부에는 일반 메서드는 물론@RequestMapping 계열의 애너테이션을 이용하는 다수의 요청 처리 메서드들이 작성될 수 있다.
요청 처리 메서드
사용자가 서버로 요청을 날리면 DispatcherServlet(이하 D.S)은 적절한 HandlerAdapter에게 URL을 넘겨주고 HandlerAdapter가 URL에 의거해 특정 Controller의 @RequestMapping이 선언된 메서드(요청 처리 메서드)를 호출한다.
요청 처리 메서드에서는전형적인 Servlet의 역할(요청 분석, 비지니스 로직 수행, 자료 저장, View 연결)이 수행된다.
요청 처리 절차
@RequestMapping
@RequestMapping
사용자의 요청은 여러 HandlerMapping과 HandlerAdapter를 통해서 처리될 수 있는데 가장 일반적으로 사용되는 것은RequestMappingHandlerMapping과RequestMappingHandlerAdapter이다. 여기서 RequestMapping은 @RequestMapping 애너테이션을 의미한다.
@RequestMapping은ElementType.TYPE과 ElementType.METHOD로 사용할 수 있다.
가장 중요한path 속성은value와 alias로 연동되어있는데사용자가 호출하는 요청의 경로 즉 URL이 등록된다.
클래스에 선언된 @RequestMapping의 path는 클래스에 속한 모든 요청처리 메서드의 path 앞에 추가된다. 일반적으로 Controller 클래스를 구성할 때업무 도메인에 따라 공통의 URL을 구성하게 되는데 클래스 레벨의 @RequestMapping을 사용하면 아주 손쉽게 URL을 구성할 수 있다.
package com.doding.hellomvc.controller;


import com.doding.hellomvc.model.service.HelloService;
import org.springframework.beans.factory.annotation.Autowired;
import org.springframework.stereotype.Controller;
import org.springframework.ui.Model;
import org.springframework.web.bind.annotation.RequestMapping;

import java.util.Random;

@Controller
@RequestMapping("/user")
public class UserController {

    @RequestMapping                         // 매핑 URL: /user
    public String showMessage(Model model) {
        String msg = "여러가지 사용자 관리 서비스 제공";
        model.addAttribute("message", msg);
        return "index";
    }


    @RequestMapping("/luckynum")            // 매핑 URL: /user/luckynum
    public String luckynum(Model model) {
        int num = new Random().nextInt();
        model.addAttribute("message", num);
        return "index";
    }
}
@Test
public void requestMappintTest() throws Exception {
    // given
    String url = "/user";
    // when
    ResultActions result = getSimpleAction(url, RequestMethod.GET);
    // then
    checkStatusIsOk(result)
      .andExpect(MockMvcResultMatchers.model().attribute("message", "여러가지 사용자 관리 서비스 제공"));

    url = "/user/luckynum";
    result = getSimpleAction(url, RequestMethod.GET);
    checkStatusIsOk(result)
      .andExpect(MockMvcResultMatchers.model().attributeExists("message"));
    }
}
호출 방식을 이용한 매핑
요청 처리 메서드는 path 뿐만 아니라GET/POST등 어떤 방식으로 호출 되느냐에 따라서도 매핑이 결정된다. 이를 위해 method 속성을 사용한다. method는 RequestMethod[] 타입인데 RequestMethod는 enum 타입이다.
public enum RequestMethod {
	GET, HEAD, POST, PUT, PATCH, DELETE, OPTIONS, TRACE;
}
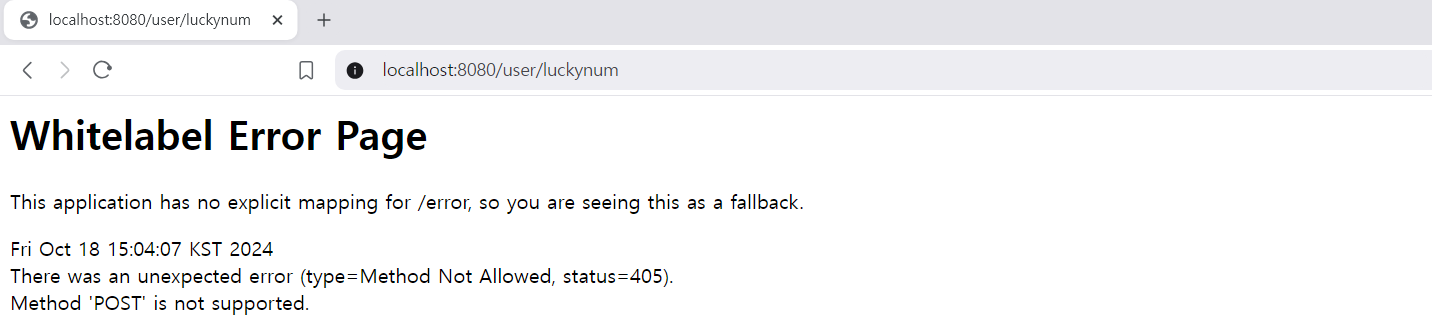
method 속성을 지정하지 않았을 경우는 모든 method에 매핑된다. 기존의 /user/luckynum 경로를 post로 호출해보자.
이처럼 동일한 URL에 대해서 요청 방식(GET/POST)에 따라 다른 컨트롤러를 호출할 수 있다는 점은 URL 설계에 많은 영향을 준다. login이나 join 처럼 어떤 동작을 위한 <form>을 먼저 보여주고 실제 동작으로 연결하는 경우가 많은데 이때path를 동일하게 하고 method를 다르게 작성하는 경우에 필요한 기능이다.
다음은 @GetMapping과 @PostMapping을 이용해서 login을 처리하는 예이다.
@GetMapping("/login")                 // 사용자에게 login form 제공
public String showLoginForm(Model model) {
    return "login";
}

@PostMapping("/login")                // 실제 로그인 처리
public String doLogin(Model model) {
    ...
    return "main";
}
요청 파라미터를 이용한 매핑
path와 method외에도 params 속성을 이용하면 요청 파라미터를 이용해서 매핑을 제한할 수 있다. params에 선언된 내용은 반드시 요청 파라미터에 포함되어야 한다.
위 상황에서 field에 값을 입력하지 않고 [회원가입]을 클릭하면 다음과 같이 400오류가 발생한다. 전달된 파라미터가 없기 때문이다. 물론 값을 입력 하면 별일 없다.
전달된 파라미터가 없다: 400 오류
요청 처리 메서드의 파라미터
다양한 파라미터 활용 가능
요청처리 메서드의 파라미터로는웹 프로그래밍에서 필요한 대부분의 것들을 필요에 따라 선언할 수 있다. 당연히선언되는 순서도 무관하다.
웹 프로그래밍을 할 때 필요한 객체들은 무엇일까? 아마도 대부분HttpServletRequest,HttpServletResponse, HttpSession을 떠올릴 것이다. 여기에Model, ModelAttribute, SessionStatus, Locale 등의 객체들이 필요에 따라 선언될 수 있다.
@GetMapping("/usewebobject")
public String useWebObject(HttpServletRequest req, HttpServletResponse resp, HttpSession session) {
    req.setAttribute("message", "use web object");  // request scope에 데이터 저장
    resp.addCookie(new Cookie("some", "cookie"));   // response를 통해 cookie 전달
    session.setAttribute("some", "attr");           // session scope에 데이터 저장
    return "index";
}
위의 예에서 확인해봤듯이 단순히 필요한 객체들을 선언만하면 메서드가 호출될 때 할당되고 사용하는데도 전혀 문제가 없다.이 객체들만 사용할 수 있으면 대부분 웹 관련 처리가 가능하다.다만 HttpServletRequest에 setAttribute를 하는 대신 Model에 addAttribute 하는 식으로사용법이 좀 더 간소화된다고 이해하면 좋다. 이런 부분이 Spring의 매력이다.
@RequestParam
요청 파라미터를 활용하기 위해서HttpServletRequest가 제공하는 getParameter() 메서드를 이용한다. 네트워크를 통해 전달되는파라미터는 오로지 문자열만 가능하기 때문에 사용 전에 원하는 타입으로의 형 변환은 필수였다.
SpringMVC에서는요청 파라미터의 값을 사용하려는 경우@RequestParam을 사용한다.
@Target(ElementType.PARAMETER)
public @interface RequestParam {
  String value() default "";                                 // 요청 파라미터의 이름
  boolean required() default true;                           // 객체형일 경우 필수 여부
  String defaultValue() default ValueConstants.DEFAULT_NONE; // 기본 값
}
@RequestParam은메서드의 파라미터에 선언할 수 있는 애너테이션이다. name 속성에는 요청에 담긴 파라미터의 이름을 명시해주면 된다. 신기한 점은 변수의 타입을 선언할 때 원하는 타입을 적어주면자동으로 형변환 처리해준다는 점이다.만약 동일한 이름으로전달되는 값이 여러 개일 경우는배열이나 List/Set 형태로받을 수 있다.
메서드의 파라미터이름과 요청 파라미터의 이름이 동일할 경우 Spring Framework 6.1이전에는 @RequestParam을 생략할 수 있었으나 6.1부터는 기본적으로 생략할 수 없다. 다만 compiler 옵션으로 -params를 추가하면 생략할 수 있다.
쿠키기술이 발전하면서 sameSite 등의 특성들이 추가되었는데 기존의 Cookie 클래스를 관련 설정이 없어서 별도로 header에 설정했어야 했다. ResponseCookie의 경우는 builder 패턴으로 쿠키를 만드는 방식으로 sameSite등까지 편리하게 설정할 수 있다. 단 쿠키를 내려보내기 위해서 단지 response에 담으면 되는건 아니고 response의 header에 Set-Cookie를 키로 ResponseCookie의 문자열 값을 내려보내주면 된다. 굳이 sameSite등이 필요 없으면 기존의 Cookie 방식도 문제는 없다.